Create or Modify Quick Views
Use Type In Functionality
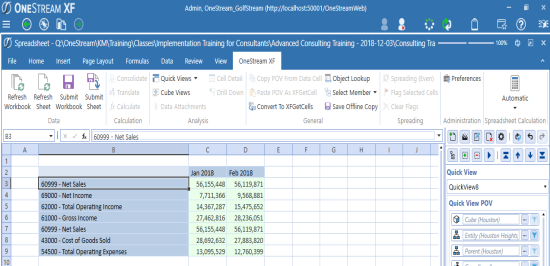
You can quickly analyze data in a Spreadsheet or using the Excel Add-in. You can create data sets using the Type in functionality. You can even create and/or modify a Quick View with Create Quick View and Rebuild Quick View.
Type In to Generate/Create a Quick View
-
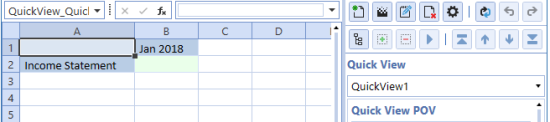
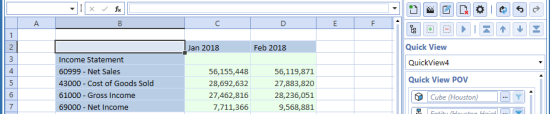
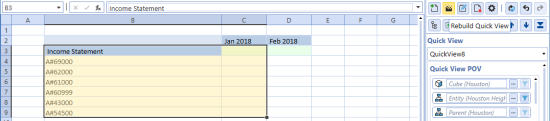
In Row 2 enter the DimensionType#MemberName A#Income Statement.
-
In Col B enter the DimensionType#MemberName T#2018M1.
-
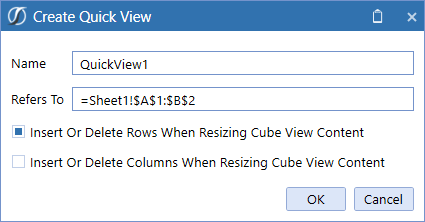
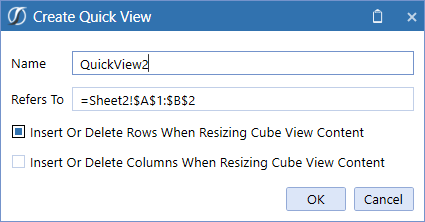
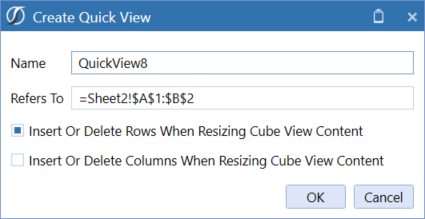
Then highlight the area and select Create Quick View, if using the Excel Add-in, select the Quick Views tab.

-
Click OK in the Create Quick View window.
-
A new Quick View shows.
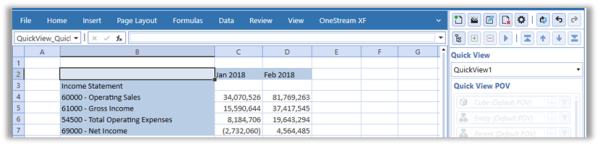
Use a comma separated member list to build the Quick View in the single row and column cell to generate the expected results.
-
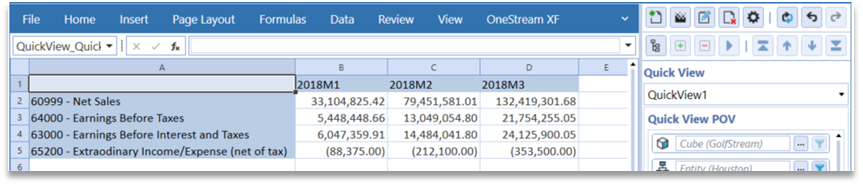
In Row 2 enter the DimensionType#Root A#60999,64000,63000,65200.
-
In Column B enter the DimensionType#Root T#2018M1,2018M2,2018M3.
-
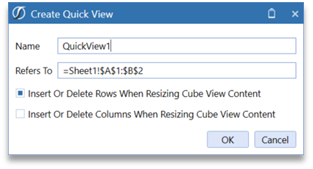
Then highlight the area and select Create Quick View.

-
Click OK in the Create Quick View window.
-
A new Quick View shows.
Use the Member Expansion Functions to build the Quick View.
-
In Row 2 enter the DimensionType#Root A#Root.Children.
-
In Col 2 enter the DimensionType#Root T#2018.Base.
-
Then highlight the area and select Create Quick View.

-
Click OK in the Create Quick View window.
-
A new Quick View shows.

Use the Member Expansion Functions to build the Quick View using comma separated members in the current cell to generate the expected results.
-
In Row 2 enter the DimensionType#Root A#Root.List(60999,64000,63000,65200).
-
In Column B enter the DimensionType#Root T#2018M1.
-
Then highlight the area and select Create Quick View.

-
Click OK in the Create Quick View window.
-
A new Quick View shows.

NOTE: If suppression options are on, certain items may not display.
Type in Member extending past the range of the existing Quick View
If extending with a new dimension # is required:
-
If needed, insert a new column to left of Quick View enter the DimensionType#MemberName A#69000, or enter the #Member Name.
-
Then highlight the area and click Rebuild.

-
You can also insert a new row if needed or in the blank row above the Quick View enter the #MemberName.
-
Then highlight the area and click Rebuild.

-
A new quick view shows.

If extending with an existing dimension # isn’t required:
-
In the row below the existing dimension type the member name 69000, or in the column next to the existing dimension type member name 2018M2.
-
Then highlight the area and click Rebuild.

-
A new quick view shows.

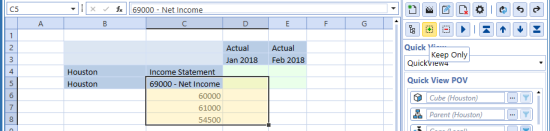
Enhance Keep Only selection to extending past the range of the existing Quick View
If extending the existing dimension # isn’t required:
-
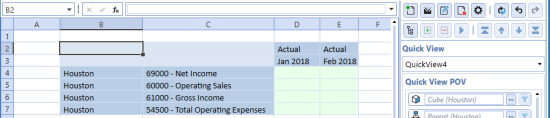
In the row below the existing dimension add the new member names 60000, 61000, 54500.
-
Then highlight the area and click Keep Only.
-
A new quick view shows.
Extending past the range of the existing Quick View adding new Members in Rows and/or Columns
If extending the existing dimension # isn’t required and adding to the end of the row or column, use the Type-In feature with comma separated list.
-
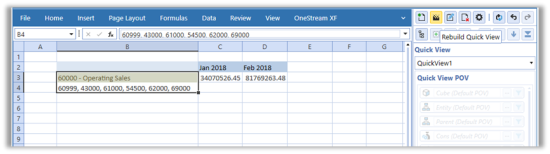
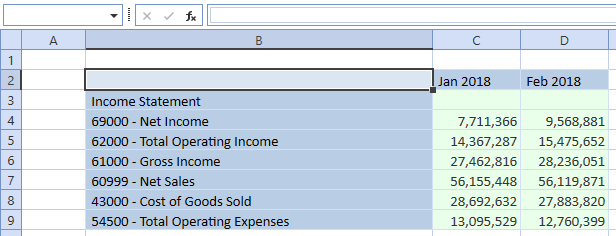
In the row below the existing dimension add the new member names: 60999, 43000, 61000, 54500, 62000, 69000.
-
Then highlight the area and click Rebuild Quick View.
-
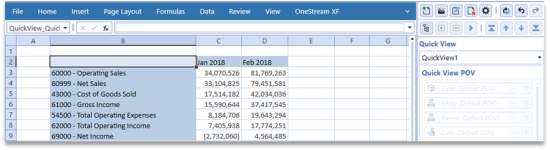
A new quick view shows.
Change dimensions in existing Quick View on the existing Dimension
If changing the existing dimension to a new dimension, the Dimension# is required.
-
Click on the existing dimension and enter a new one.

-
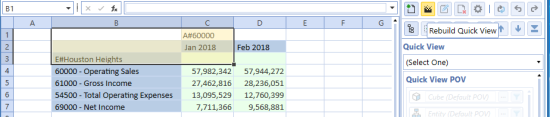
For example, change the Account dimension to the Entity dimension using E#Houston Heights and add the Operating Sales A#60000 above the time dimension.
-
Then highlight the area and click Rebuild Quick View.
-
A new quick view shows.

Changing one dimension to another by entering multiple members of a new dimension
You can change from one dimension to another by entering multiple members of a new dimension in a single cell separated by a comma. For example, change the Account dimension to the Entity dimension.
-
Enter E#Houston Heights, South Houston and add Operating Sales A#60000 above the time dimension.

-
Then highlight the area and click Rebuild Quick View.
-
The two entities that were comma separated in a single cell in the two rows and the account in both columns.

Change members on the existing dimension in an existing Quick View
You can modify members of an existing dimension in a Quick View by entering information in the existing field with a new member name.
-
Enter three new members 60999, 43000, 61000. A dimension# prefix isn’t necessary if it’s the same dimension.
-
Then highlight the new members and click Rebuild Quick View.
-
This results in three new members 60999, 43000, 61000 replacing 60000 and 54500.
Add or insert members on the existing dimension in an existing Quick View
You can add to the members of an existing dimension by entering new information in the existing cell using the comma separated list of members.
-
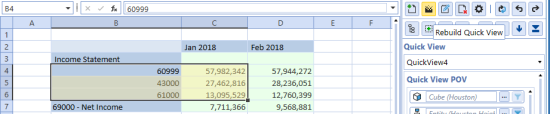
Enter three new members 60999, 43000, 61000 in the same cell.
A dimension# prefix isn’t necessary if using the same dimension; you need to use a space after the comma if member names are numeric or start with an apostrophe i.e; ‘60999,43000,61000.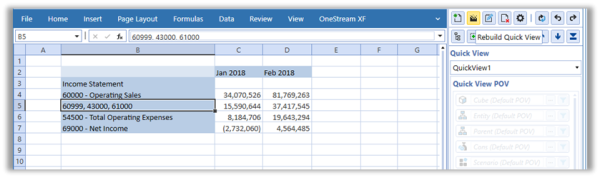
-
Then highlight the new members and click Rebuild Quick View.
-
This results in three new members 60999, 43000, 61000 in addition to 60000, 61000, 54500, 69000.
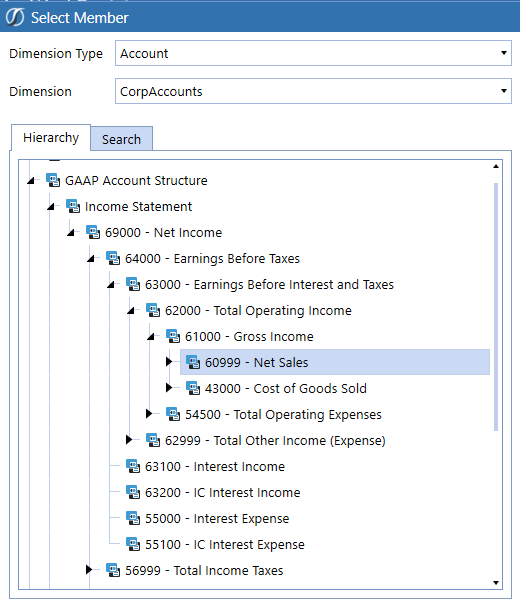
Select Member Dialog Icon in Quick Views
Use Select Member to search and show members in the hierarchy and multi-selected members can be added to a Quick View.
Default position of the selected member using Select Member Dialog button
-
Select the dimension to be located on the hierarchy.
-
Click Select Member.
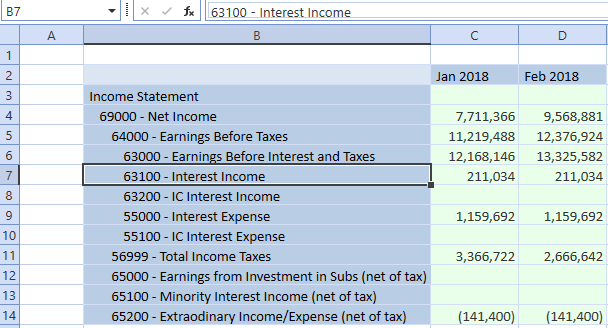
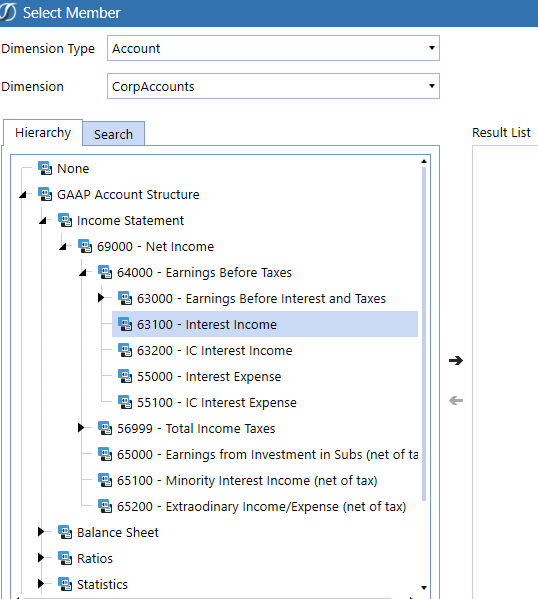
Notice that the Account selected in the Quick View by default is “63100 – Interest Income”. The “Select Member” button will default to the respective dimension type, dimension and member when selected in the Quick View.
Multi-select members to add to a Quick View
-
Select a dimension in the Quick View.
-
Click the Select Member button.
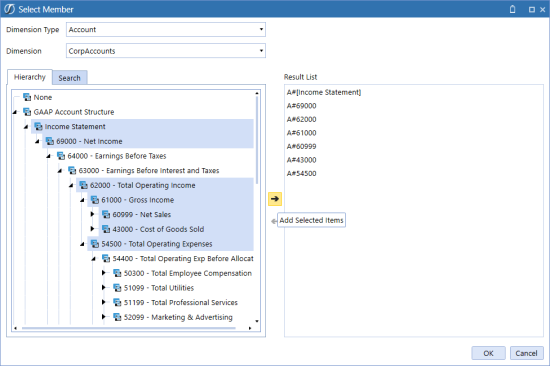
The cursor will default to the selected member in the Quick View Hierarchy. The user can now multi-select members in the Hierarchy tab by using Ctrl+click or Shift+click, then selecting the right arrow button to add these members to the Result List.
-
Highlight the new records added and click the Rebuild Quick View button.
The results return the members that were multi-selected in the Quick View.

NOTE: To allow the Member Selector to transpose the selections to Columns, the user should first highlight the blank columns, outside the current QuickView range. The selections in the Member Selector will fill to this range without overwriting the current QuickView Column, rather than applying down rows. Once added, select the active QuickView and new column range as documented to enable the QuickView Rebuild function for Type-In.
NOTE: The Select Member Dialog button on the Quick View toolbar control will include the dimension key in the result list and on OK. Separately the Select Member Dialog button on the ribbon will not include the dimension key in the result list and on OK. Users should refer to the Select Member Dialog button on the ribbon when using to build any XFGet… function. The context menu will include the dimension key or not depending if the cell is on a Quick View or not.
Multi-Select in a Grid View
-
You can use <Ctrl + click> to select multiple rows at a time.
-
You can click and drag to select multiple rows.
-
Searching data using <Ctrl + F> is supported.
Searching for Members to Add to a Quick View
-
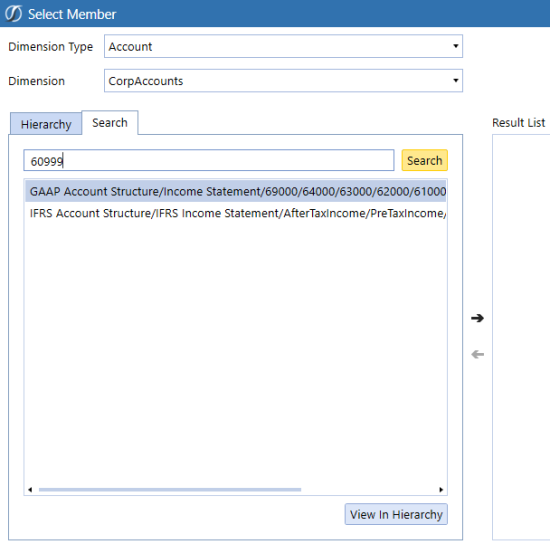
Select a dimension in the Quick View and cliick the Select Member button.
-
Switch to the search tab and type in the member name for the search and click Search.
-
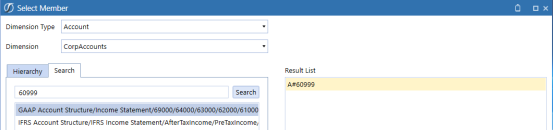
Select a member to add to the selected member to the result list.
-
Highlight the area and click Rebuild Quick View.

The results are:

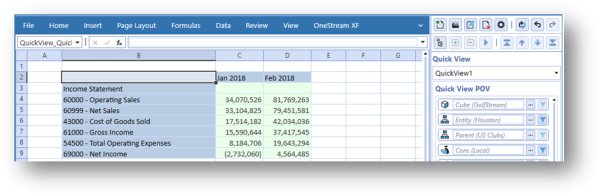
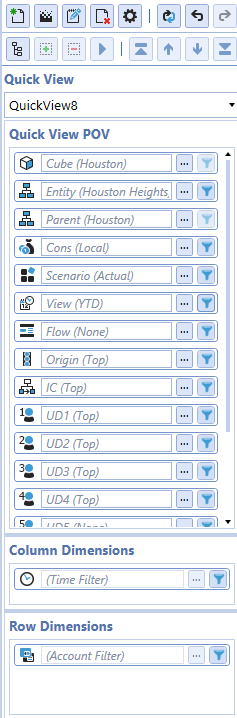
POV Controls in a Quick View
The POV Controls display the default POV settings being used when a member is not entered.
User Defined Description – Excel Addin / Spreadsheet
The User Defined Descriptions will display in the Quick View POV panel. If no custom description is entered, the dimension type name, such as UD1, will display. Hovering over the Quick View POV dimension label will also launch a tool tip which will display the dimension description. The Quick View POV default MemberFilter will also display the current Cube POV. If a member is selected, only the selected member will display in the Quick View POV panel. See application Properties and then User Defined Dimensions (Descriptions) for more information.

Reverse Order Members
Functionality to support reversing the direction of your Dimension Tree is now supported in with “Quick View Double-Click” behavior.
To change the double-click behavior, select Preferences under the Administration menu. In the Quick View Double-Click Behavior section, select the drop-down list for Default Expansion For Rows and select TreeDescendantsR.
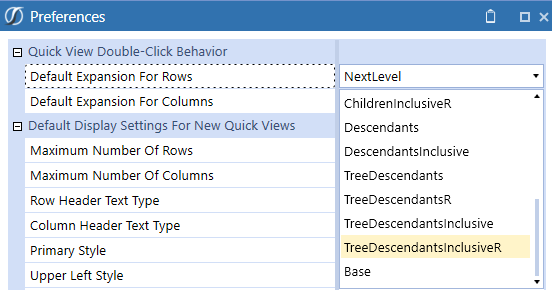
In this example the result is the reverse direction of the originating account on expansion for rows when using the double click.
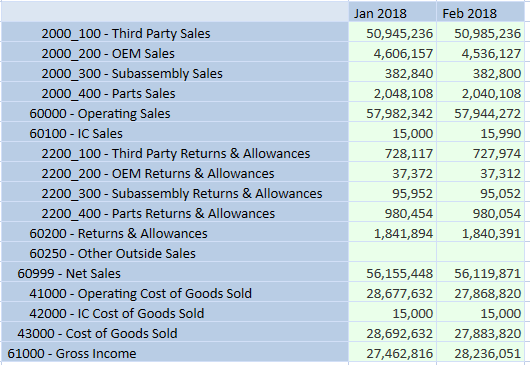
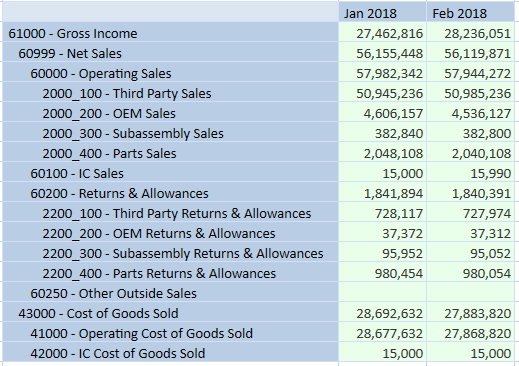
Quick View and Cube View Coloring for Data Values
Background and text colors for Quick View and Cube View data are set by default. Colors indicate the state of data in a cell.
The following tables show the default colors used in Quick View and Cube View cells.
| Color | State |
|---|---|
| White (Hex #FFFFFF) | Default background color |
| Light Yellow (Hex #FFFFD7) | Cell value has not been saved |
| Light Red (Hex #FFEAEA) | Cell value is invalid |
| Light Green (Hex #EAFFEA) | Cell value is valid (value can be calculated or not calculated, or have changed metadata) |
| Color | Description |
|---|---|
| Black (Hex #000000) | Default font color. |
| Light Gray (Hex #D3D3D3 | Cell value contains derived data. |
Cell text background and text colors in a Quick View can be changed by using Excel cell properties.